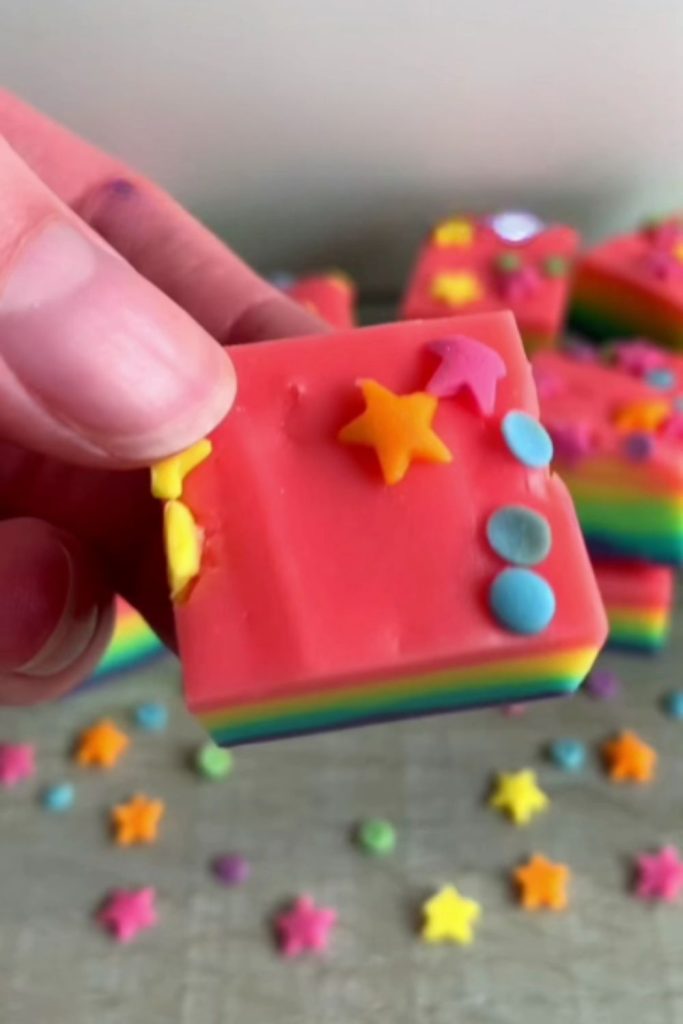
This Slow Cooker Rainbow Fudge is the perfect treat when you want something fun, colorful, and easy to make. It’s one of those recipes where you get to be a little creative with colors and still end up with something deliciously creamy.
If you’re into slow cooker fudge recipes, you should definitely check out my Slow Cooker Cookie Monster Fudge and Slow Cooker Candy Cane Fudge—they’re equally fun and just as easy to whip up for any occasion!
Jump to Recipe Print RecipeWhy This Recipe Works
Making Slow Cooker Rainbow Fudge always takes me back to childhood parties where the more colorful the treats, the better! I love this recipe because it’s simple yet magical, transforming basic ingredients into a vibrant, eye-catching dessert.
The slow cooker does most of the work, melting everything down to a perfect consistency while you get to play with colors and layers. It’s a fun project for kids and adults alike, and the best part is that it never fails to impress at gatherings.
Whether you’re whipping it up for a birthday party or just adding a bit of color to your day, this recipe brings a sweet splash of joy to every occasion. Plus, the creamy, melt-in-your-mouth texture is impossible to resist!
Recipe Ingredients
- White Chocolate: You’ll need 2-4 bags of white cooking chocolate. It’s the base of the fudge, and the smooth, creamy texture makes it a perfect choice for this rainbow fudge. The amount depends on the size of your loaf pan.
- Sweetened Condensed Milk: This is what gives the fudge its rich, sweet flavor. You’ll need one tin for every two bags of chocolate. It also helps bind everything together.
- Butter: Just a tablespoon is all you need to make the fudge extra creamy and smooth. Use real butter for the best results.
- Vanilla Extract: Adds a hint of warmth and enhances the sweetness of the fudge. A teaspoon will do the trick.
- Food Dye: You’ll need red, blue, and yellow food coloring. These will help you create the vibrant rainbow effect. Mix them to make all the colors of the rainbow!
Step-by-Step Directions
Step One: Begin by adding your white cooking chocolate, sweetened condensed milk, butter, and vanilla extract into the slow cooker on low heat. Let the mixture melt slowly, stirring it about every 15 minutes to prevent sticking.
Step Two: While the chocolate is melting, line your loaf pan with baking paper to ensure an easy release once the fudge has set. You may notice a slight “skin” forming on the surface of the fudge mixture—this is normal. Simply stir it back into the mixture to keep everything smooth.
Step Three: After about 90 minutes, your fudge mixture should be smooth and well-blended. Take a ladle and pour a portion into a ceramic bowl. Add a few drops of food coloring and stir until you achieve your desired color.
Step Four: Once the color is well-blended, pour the dyed fudge into the prepared loaf pan. Pop the pan into the fridge for about 5-10 minutes to allow that layer to set while you rinse the bowl and prepare for the next color.
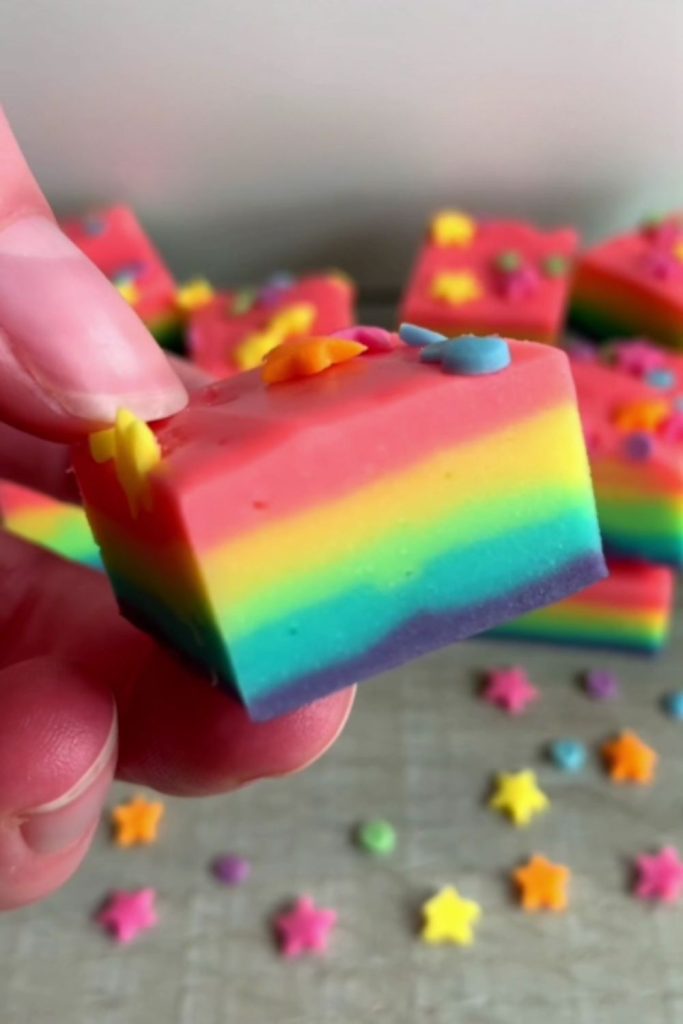
Step Five: Repeat the coloring and layering process for each new color, ensuring you work quickly enough to create even layers but allowing each to chill for a few minutes between.
Step Six: After you’ve finished layering, refrigerate the fudge for about 5 hours or until fully set. Once firm, use a clean knife to cut the fudge into your desired thickness, and enjoy your colorful, creamy treat!
How to serve
- I love cutting the fudge into bite-sized squares and arranging them on a bright platter for a splash of vibrant sweetness. It’s perfect for birthday parties, family gatherings, or just when you want to add a little magic to your dessert table.
- For a whimsical touch, pair the fudge with fresh fruit like strawberries or raspberries— the tartness of the berries complements the rich, creamy fudge beautifully. Or, if you’re like me and hosting a kid-friendly event, add some rainbow sprinkles on top for an extra pop of color!
- And don’t forget, this fudge also makes a great edible gift! Wrap a few pieces in cute cellophane bags tied with colorful ribbons, and you’ve got an easy, sweet treat to brighten someone’s day.
Recipe FAQs and Variations
Can I use dark chocolate instead of white chocolate?
Yes, but keep in mind that dark chocolate will change both the taste and color of the fudge. White chocolate provides the best canvas for vibrant rainbow colors, while dark chocolate will result in a deeper, richer fudge with less vibrant hues.
What’s the best way to store Slow Cooker Rainbow Fudge?
Store the fudge in an airtight container, either at room temperature for up to 5 days or in the refrigerator for up to 2 weeks. If you prefer a firmer texture, refrigerating the fudge will help it hold its shape.
Can I use gel food coloring instead of liquid?
Yes, gel food coloring works great and often gives more vibrant colors with less liquid. Just be sure to mix it well to get an even shade throughout the fudge.
Check out More Slow Cooker Recipes:
Slow Cooker Rainbow Fudge
Course: DessertCuisine: AmericanDifficulty: Easy12
servings10
minutes1
hour30
minutes280
kcalThis Slow Cooker Rainbow Fudge is the perfect treat when you want something fun, colorful, and easy to make. It’s one of those recipes where you get to be a little creative with colors and still end up with something deliciously creamy.
Ingredients
2-4 bags of white cooking chocolate (use 2 bags for smaller loaf pans, up to 4 for larger)
1-2 cans of sweetened condensed milk (1 can for every 2 bags of chocolate)
1 tablespoon of unsalted butter
1 teaspoon of vanilla extract
Food coloring (red, blue, yellow—combine to create additional colors)
Directions
- Set your slow cooker to low heat. Add the white chocolate, sweetened condensed milk, butter, and vanilla extract. Stir the mixture to help combine the ingredients as they begin to melt.
- Stir the mixture every 15 minutes to ensure the chocolate melts evenly. You might notice a thin “skin” forming on top; this is normal. Stir it back into the mixture until it’s smooth.
- Prepare your loaf pan by lining it with baking paper. This will make it easier to remove the fudge once it’s set.
- After about 90 minutes, the chocolate mixture should be smooth and fully melted. Use a ladle to scoop a portion of the fudge into a ceramic bowl. Add a few drops of food coloring, then stir until you get your desired color.
- Quickly pour the colored fudge layer into the prepared loaf pan, spreading it evenly. Place the pan in the fridge for 5-10 minutes to let that layer set. Wash the bowl and spoon to prepare for the next layer.
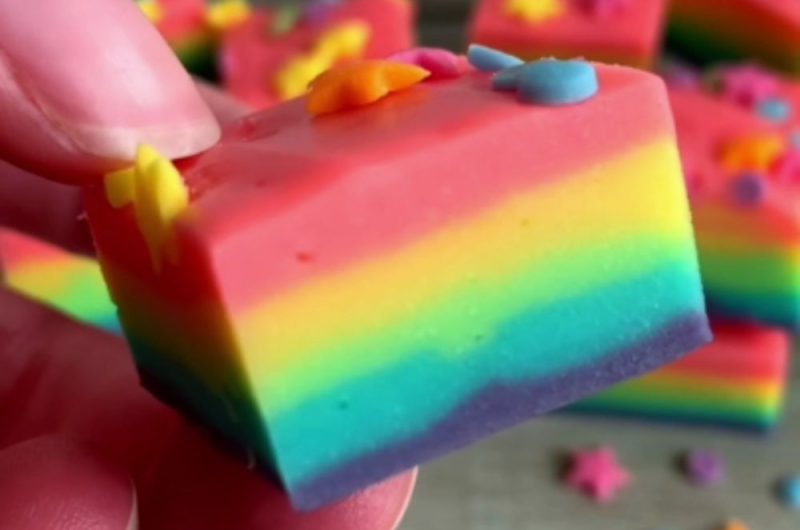
- Repeat this process for each color, layering the fudge as you go. Make sure to evenly distribute the mixture to keep the layers consistent.
- Once all layers are done, refrigerate the fudge for at least 5 hours to let it set completely. After it’s firm, use a sharp knife to cut the fudge into your desired sizes, and enjoy!


Leave a Reply